How to use a binding foot
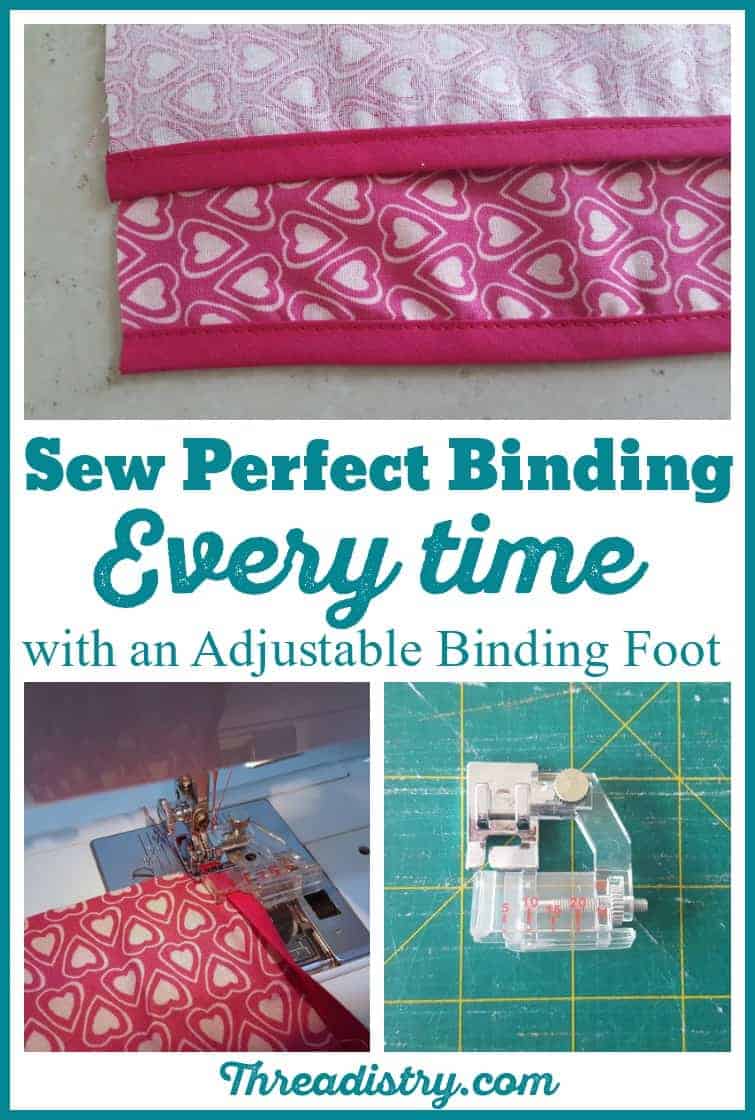
Sew perfect binding every time with an adjustable binding foot. An easy tutorial with lots of tips here for how to use a binding foot for quilting or clothes. I’ll never sew bias binding another way after using this cheap tool that’s available for most sewing machines, including Janome, Brother and Bernina.
It’s a new year! Have you set any sewing resolutions? I was going to set the resolution to sew every day, even if it’s just a few cross-stitches or one seam, but the more I thought about it, the less it seemed like a good idea. I want sewing to be something I want to do. Inspiration dries up and I rebel against myself if I feel it is something I have to do.
So instead, I’m sticking with wishy-washy goals like sewing more often (maybe every day if time and inspiration suits), actually make the projects in my head that I already have the fabric for, and to be adventurous and try new techniques and projects.
Disclosure: This post contains affiliate links. If you purchase after clicking these links, Threadistry may receive a small commission, at no cost to you.
Along those lines, I’m participating in the New Sews for the New Year . Rather than sewing a new pattern for the new year, I’m sharing my new toy:
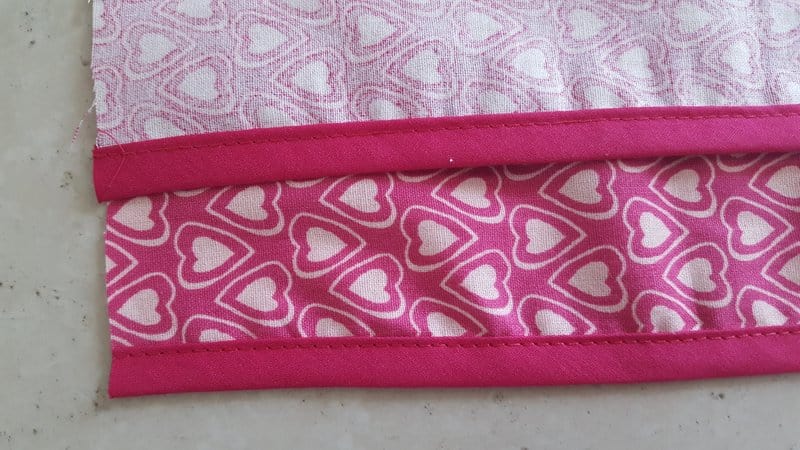
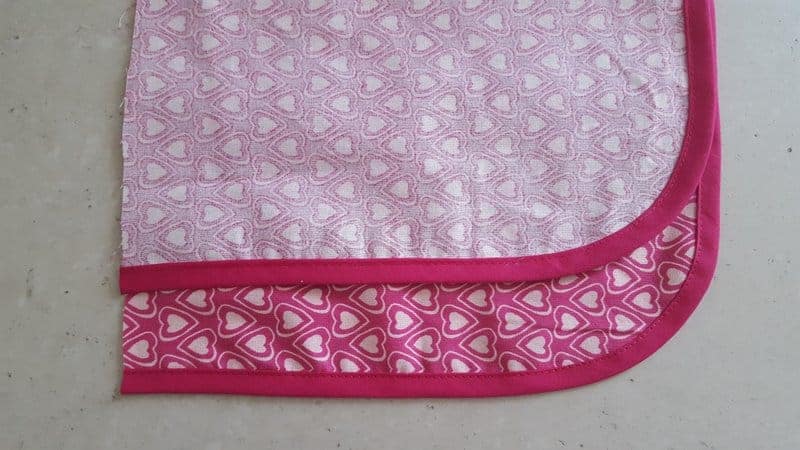
An adjustable binding foot. I bought this one from Amazon as a little Christmas present for myself, and it has made such a difference to my sewing. Look how perfect the binding is on this skirt – front and back:
Here’s how to use a binding foot:
What is an adjustable binding foot?
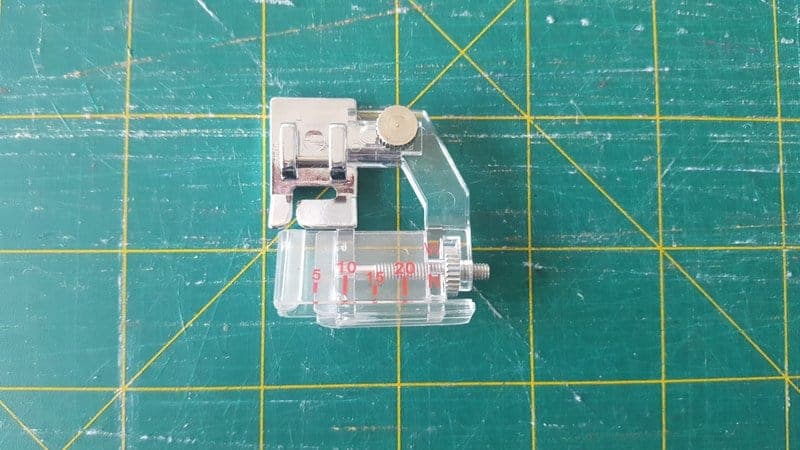
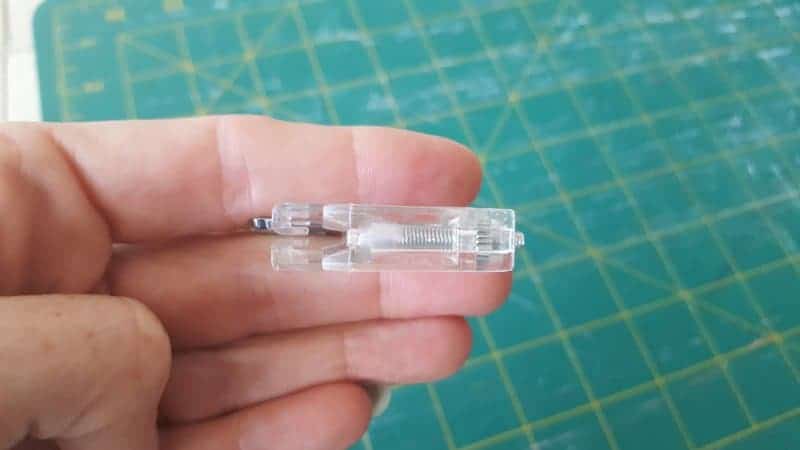
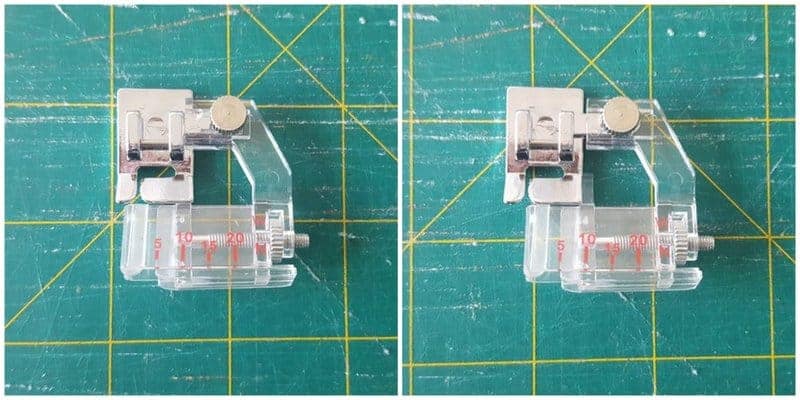
An adjustable binding foot is a sewing machine foot that allows you to sew double fold binding perfectly. Depending on your sewing machine, you can get a snap-on or screw-on foot (that has its own ankle). It works for quilting as well as garment sewing.
There is a guide at the front of the foot that folds the binding, with a slot between the guides for the fabric you are binding. The screw at the front allows you to adjust the width of the guide so you can use binding with a finished width of 5mm to 20mm. The screw at the back changes the position of the whole binding attachment relative to the needle. When aligned to the right, the centre needle is in the perfect position to sew the binding, but you might find the fabric feeds better using the left position (and adjusting your needle position to suit).
An adjustable binding foot can be used for straight fabrics, curves and outside corners. It can’t be used for inside corners. It works best with pre-folded double-fold bias binding, but it is possible to use it without the binding being pre-folded (just take it slower, feeding the binding through.
How to use a binding foot
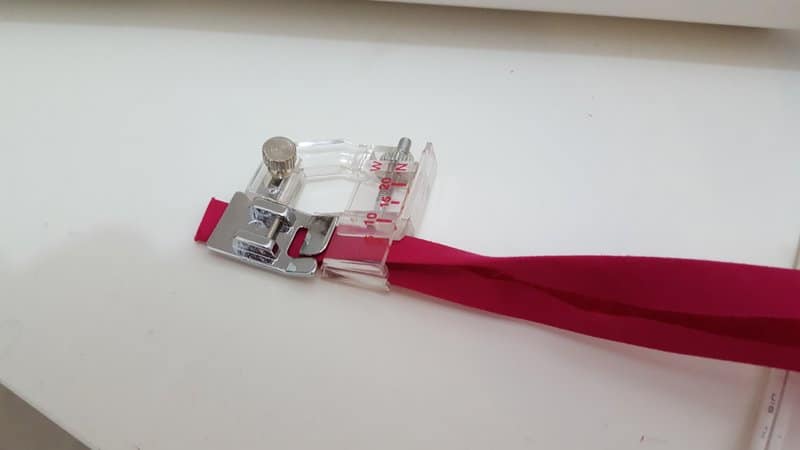
- Insert the binding through the guides in the presser foot. Use a pin or stiletto to guide the binding if it gets stuck.
- Adjust the width of the guide by turning the dial at the front until it is the same as the binding width.
- Insert the main fabric through the gap between the binding guides, lining the edge of the fabric up with the centre fold of the binding.
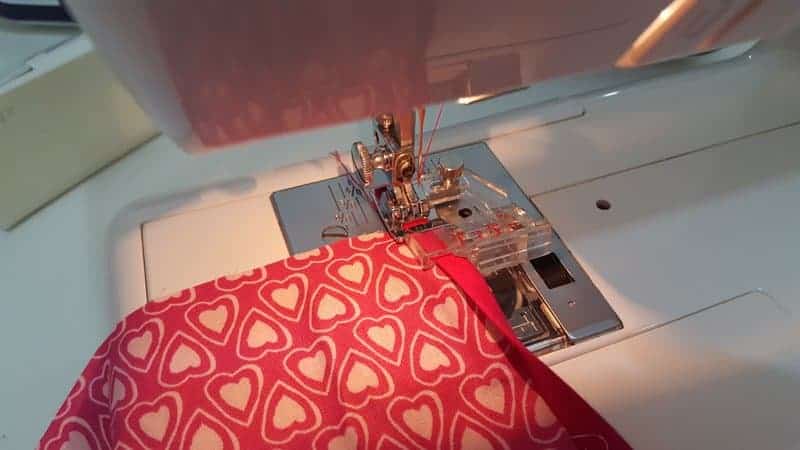
- Attach the binding foot to the sewing machine.
- Adjust the needle position to close to the edge of the binding. This can usually be done by using adjust the zigzag width when you are using a straight stitch.
- Start sewing, taking care to ensure the fabric edge stays at the fold of the binding.
Tips for using an adjustable binding foot
- The plastic guides have a bit of flex to make it easier to insert your main fabric. It also helps to open up the jaws a bit to help ease the fabric through sewing over seams.
- It’s easiest to get the binding into position with the foot off the sewing machine, and then attach the foot when it’s all in position.
- If you are sewing binding to more than one piece of fabric, when you have finished sewing the first piece, pull the fabric and binding to the back, keeping the binding in the guides. This will save you time rethreading the binding in.
- You can use decorative stitches for an even fancier touch!
- The foot works best with woven binding. I used it with ribbing on jersey fabric and the binding was stretched as it went through, so it wasn’t the best finish.
So know you know how to use a binding foot, pick up one and give it a go. You’ll be amazed at how perfectly your binding is attached and won’t know what you did without it!