
The easiest way to sew a Log Cabin Quilt Block (no measuring required!)
Learn how to sew a log cabin quilt block with minimal measuring with this video and photo tutorial, including a free log cabin quilt block calculator.
The log cabin quilt block is one of the easiest quilt blocks for beginners. With this simple tutorial, there’s no need to worry about accurately cutting lots of pieces.

This post contains affiliate links. If you purchase after clicking these links, Threadistry receives a small commission, at no cost to you.
What is a log cabin quilt block?
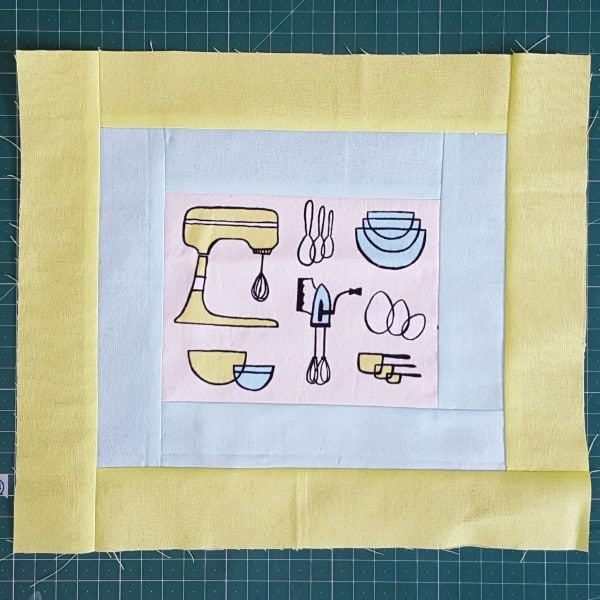
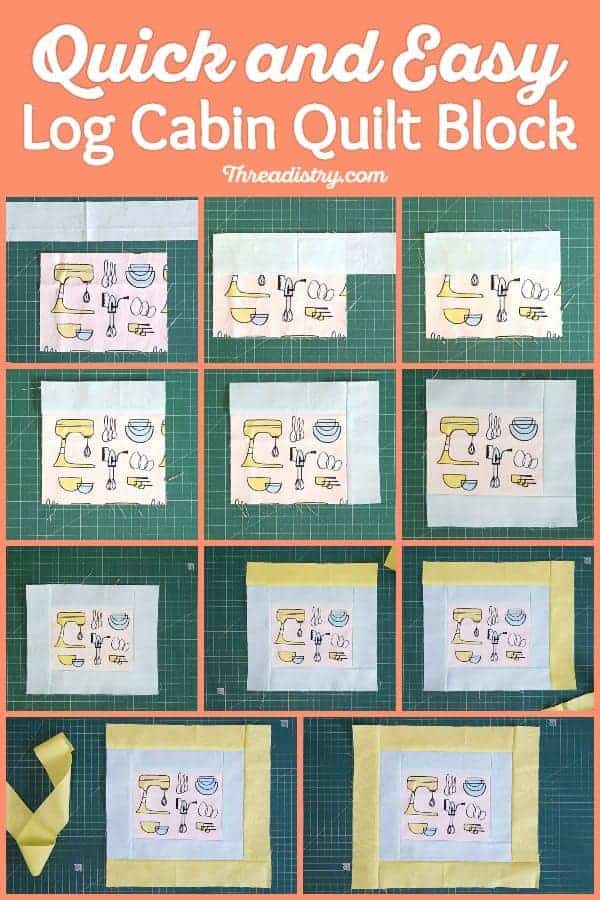
The log cabin quilt block is strips of fabric (logs) sewn around a centre square (or rectangle). The traditional log cabin quilt block has a red centre with light fabrics on two side and dark fabrics in the other two sides.
In these days of creative modern quilting, there’s no need to stick with these rules! For this tutorial, I’ll use the log cabin block to frame a feature fabric in the centre:
For more log cabin quilt sewing inspiration, check out the Fast & Flexible Log Cabin Quilts course with Nancy Smith.
Log Cabin Quilt Block Supplies
- Quilting Cotton for centre
- Strips of quilting cotton for logs
- Coordinating thread
- Sewing machine
- Quarter inch seam foot (optional)
Log Cabin Quilt Block Size Calculator
For a traditional square log cabin quilt, use the calculator below to determine the log and centre square size for any quilt block size. Note: for ease of cutting, the log cabin quilt block measurements are to the quarter inch, and the centre square may be a different size to the logs.
If you want to make a log cabin quilt using a jelly roll, the 14″ quilt block with 3 rounds is the perfect size, resulting in a 2.5″ centre square and logs.
How to make a Log Cabin Quilt Block
Watch the video to see the easiest way to sew a log cabin quilt block, or scroll for the step-by-step tutorial:
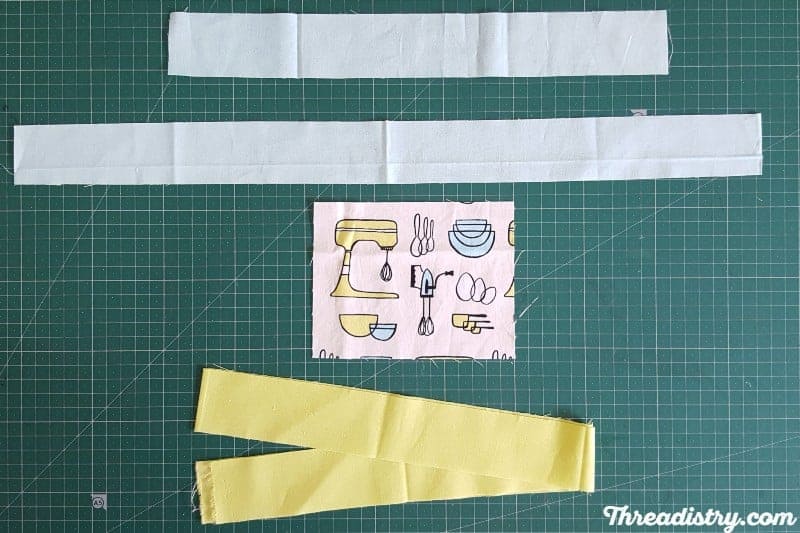
- Cut the centre square (or rectangle) from the feature fabric.
- Cut log fabric into the required strip width (see calculator above).
- Place a strip of fabric on one edge of the feature fabric, right sides together, lining up one corner and one edge. Leave the excess fabric strip hanging from the end of the centre piece.
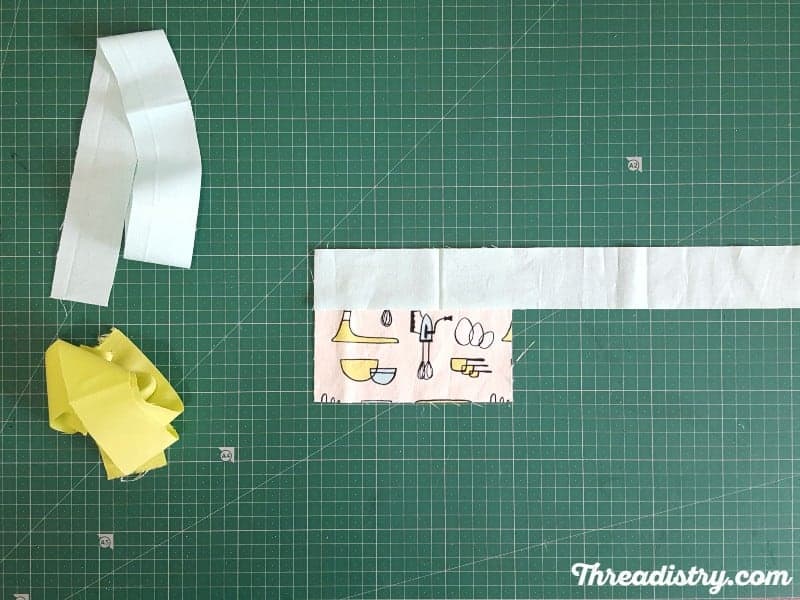
- Sew fabric strip in place.

- Trim the excess fabric strip only the edge of the centre square.

- Press the seam open (with seam allowances towards the darker fabric).
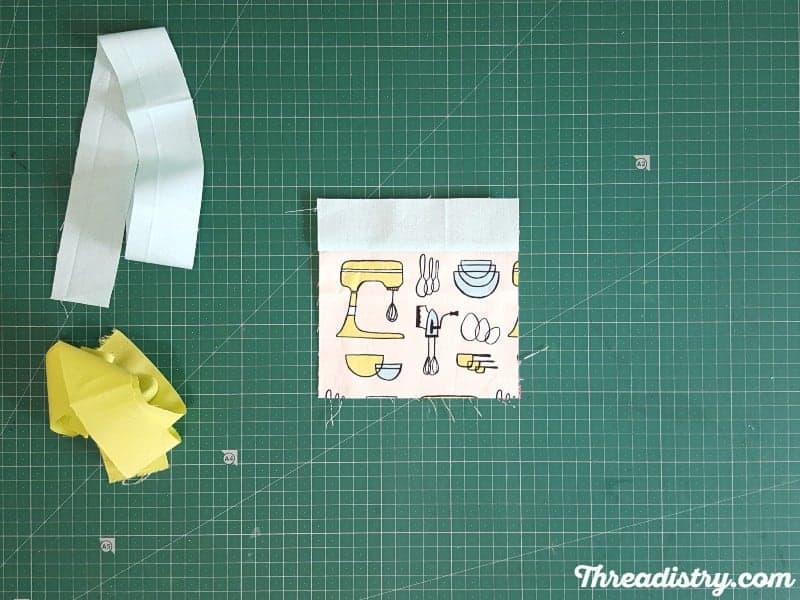
- Repeat steps 3 to 6 for the next side of the feature fabric, working in a clockwise direction.
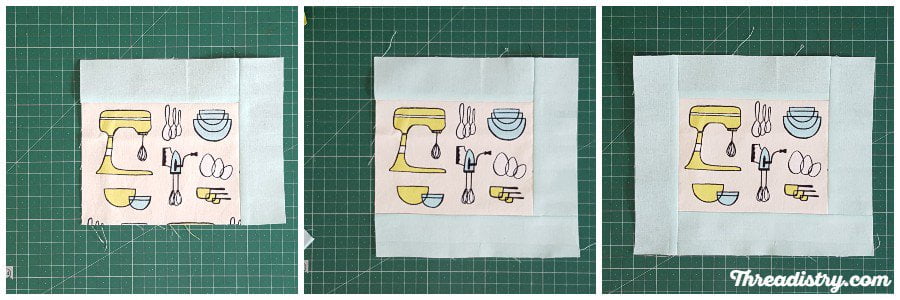
- Keep adding fabric strips in a clockwise manner until you reach the required block size.

Come back to see what I make with this quilt block!