What is seam allowance? | Sewing for beginners
Understanding seam allowance is an important part of learning to sew. If you don’t sew with the correct seam allowance, seams won’t line up, and your finished item may end up the wrong size (and might not fit!).
Let’s look at what is seam allowance, why it’s important and how much to use:
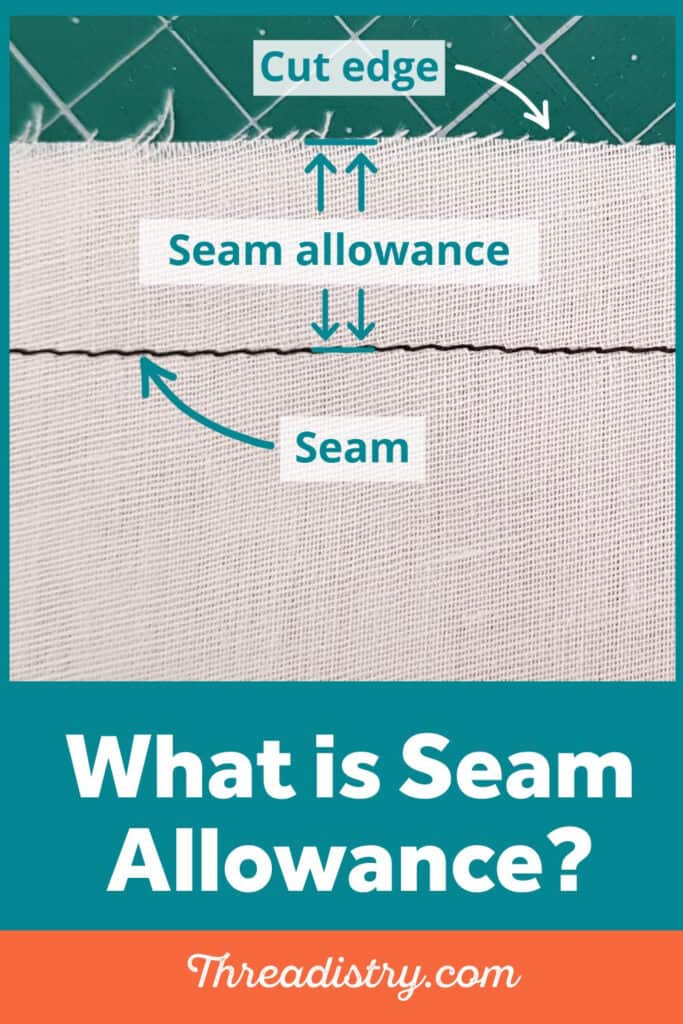
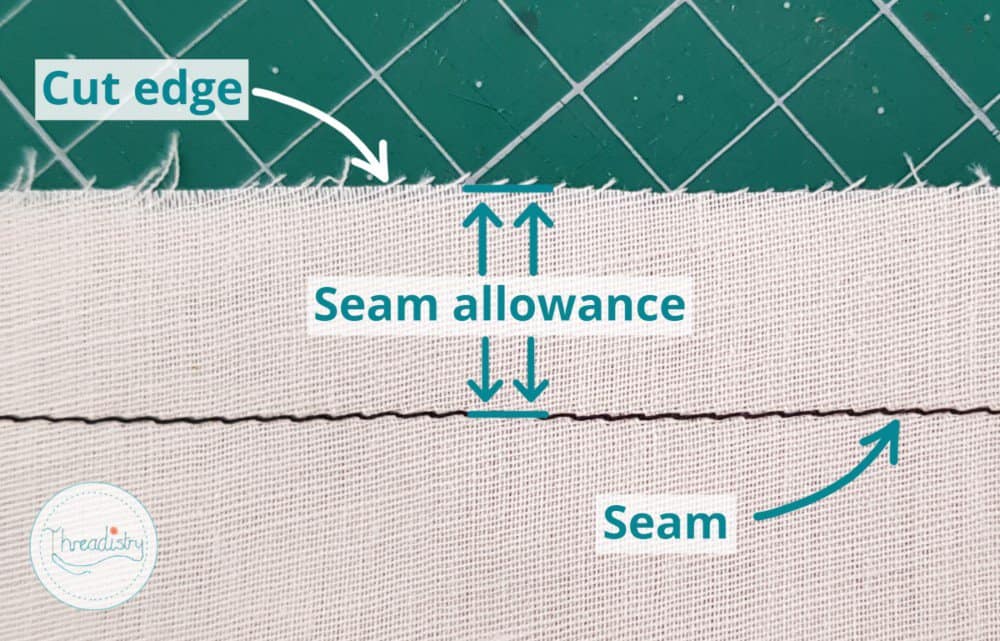
What is seam allowance?
Seam allowance is the extra fabric between the seamline and the edge of the fabric when two (or more) pieces of fabric are sewn together.
What happens if I use the wrong seam allowance?
Here are some of the problems that can occur if you sew with the wrong seam allowance:
- Wrong finished size
- If you sew with too large a seam allowance, the finished item will be smaller than intended.
- If you sew with too small a seam allowance, the finished item will end up larger.
- Misaligned pattern pieces and details
- If there are more seam lines in one pattern piece than the one it connects to, if you sew with the incorrect seam allowance, your pattern pieces won’t line up. Examples of this are when one piece is color-blocked or has a yoke.
- Details such as darts and pockets can also end up in the wrong spot if seams aren’t sewn correctly.
- Pattern pieces are designed to line up at the seam line. If you use the wrong seam allowance, curves won’t line up (and you’ll end up trimming random bits of fabric to make them line up or you’ll stretch and distort the fabric to force them to match).
- Weakened seams
- If you sew with too small a seam allowance on loose-weave fabric, your seam allowance can shred and your garment may come apart at the seams! This has happened to me with fitted linen pants.
- Extra bulk
- Too large a seam allowance can lead to bulk at seams and edges, such as in collars, pockets and shoulder seams.
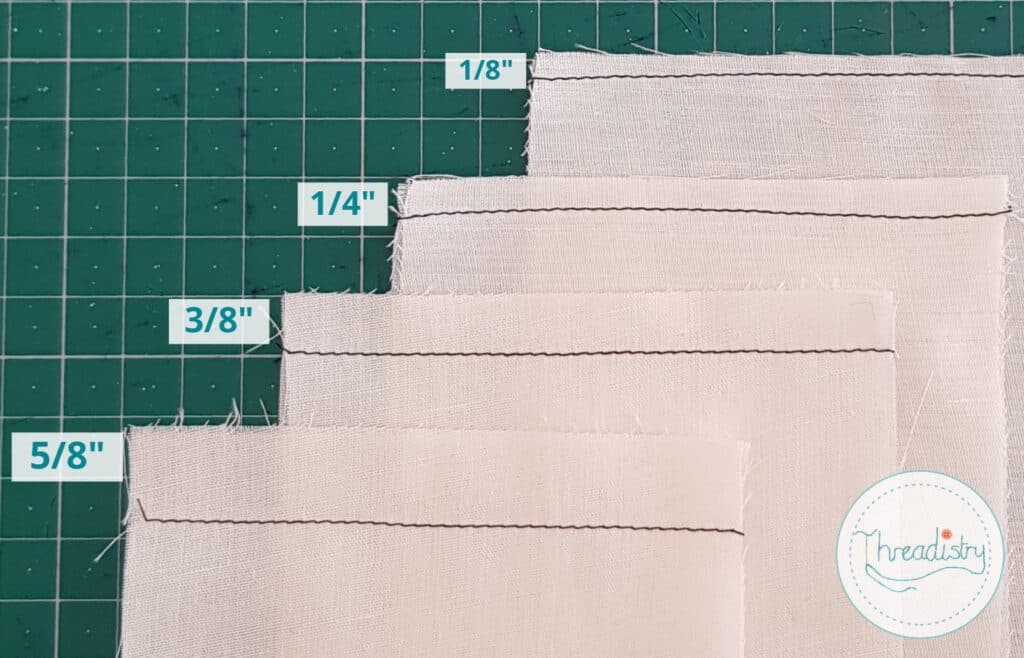
What is the standard seam allowance?
There is no single standard seam allowance, and can even vary for different seams in the same garment. Every pattern designer has their own preferences for seam allowance.
| Type of Seam | Seam allowance | Notes |
|---|---|---|
| Felt toys | none | For felt toys, it’s common for the fabric to be lined up edge to edge and visible seams are a feature of the toy (such as a blanket stitch). In this case, there is no seam allowance. |
| Doll making | 1/8″ to 1/4″ (3-6mm) | For tiny sewing projects, such as dolls and doll clothes, a tiny seam allowance is used. Sometimes a larger seam allowance is used for ease of sewing and then trimmed back. |
| Quilt piecing | 1/4″ (6mm) | Quilts are made from stable fabric and seams are enclosed in the quilt layers |
| Bag making | 1/2″ (12mm) | Bag making often involves sewing multiple layers together (such as linings and outer layers) and typically have a 1/2″ seam allowance. |
| Garment sewing | 1/4″ to 5/8″ or more | Individual pattern designers have their own preferences for seam allowances, depending on the type of fabric, the individual seam and whether a serger is being used. |
| Commercial sewing patterns | 5/8″ (16mm) | The major pattern companies (eg Simplicity, McCalls, Vogue, Butterick) typically use this larger seam allowance. |
Note: Always check your individual pattern for the required seam allowance!
The type of seam finish can also impact the seam allowance. For example, a French seam requires a larger seam allowance to create a fully enclosed seam.
Benefits of a larger seam allowance
When should you use a larger seam allowance? Here are some of the benefits of a larger seam allowance:
- Extra fabric in the seam allowance means you can let out the seams, if your pattern is too small in an area.
- A larger seam allowance means there is more fabric on both sides of the needle for the feed dogs to “grab”. This can make the fabric feed more evenly and easily.
- A larger seam allowance is best for loose-weave fabrics and fabrics the fray easily. It stops the seams from shredding and pulling apart (during the sewing process or when you’re wearing the garment!).
- It also makes it easier to ensure you’ve caught all layers with your seam when sewing multiple layers (like a gathered skirt between the layers of a lined bodice).
- It is easier to unpick/remove a seam with a larger seam allowance without fraying or damaging the fabric. (Nothing worse than completely shredded the seam allowance when ripping a seam!)
Benefits of a smaller seam allowance
In some situations, it’s better to have a smaller seam allowance:
- It might not seem like much, but a smaller seam allowance uses less fabric. Depending on your pattern layout, you may be able to save fabric (or have larger scraps to use for other projects!)
- A small seam allowance can make it easier to match opposing curved seams (eg a princess seam where you have one concave and one convex curved piece of fabric). There is a smaller difference in length between the two cut edges of fabric which can make it easier to align your seam line without puckers.
- A smaller seam allowance also creates less bulk. This can be particularly useful on tight curves and small pieces. Note: The bulk can be reduced by trimming the seam allowance after sewing.
How do I find what seam allowance is included in a pattern?
Different pattern designers can include the seam allowance in different places in the pattern instructions, such as:
- on the pattern pieces
- in the pattern information section
- in the header or footer of pattern instructions
- on each step of the pattern
Note: Some patterns, particularly from European countries, don’t include seam allowance. You will need to add it to your pattern before cutting your fabric.
If you’re struggling to find the seam allowance in a pdf pattern, search for the words “seam allowance” in Adobe Acrobat by pressing CTRL+F (CMD+F on Mac) or opening the “Edit” and selecting “Find”. I seem to have a blindness to the words seam allowance and this has helped me so many times!
How do I sew the seam allowance?
Find the marking on your sewing machine needle plate for your required seam allowance. Line up the raw edge of your fabric with that marking as it passes the needle.
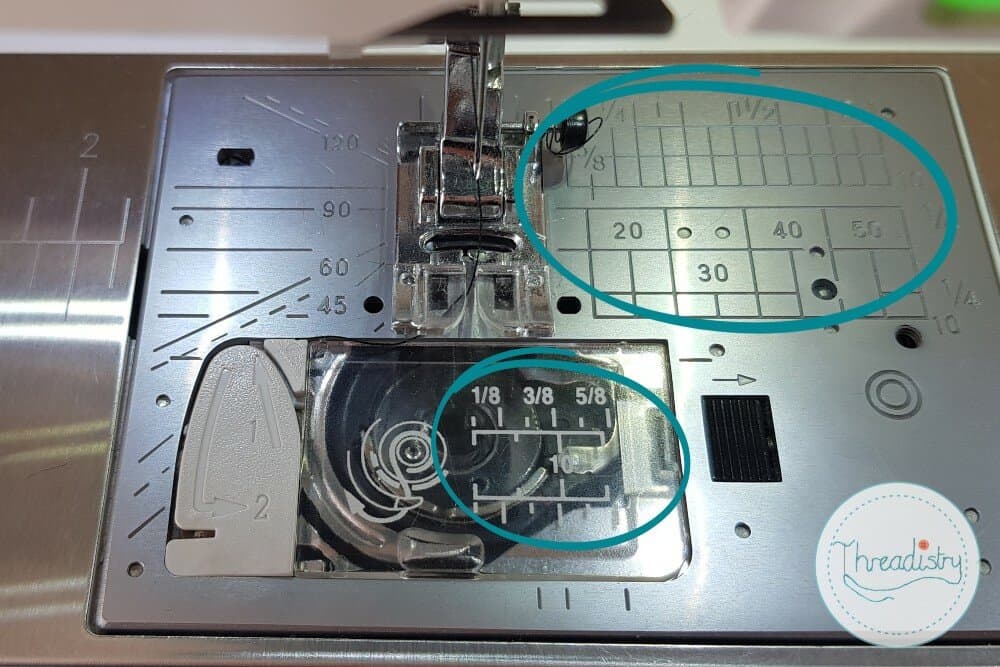
Note: The markings on the needle plate apply when the needle is in the centre position. If your needle is in a different position, you should adjust your seam allowance reference point.
It can be helpful to use a line on your presser foot as a guide, such as the outer edge is often 3/8″ and the inner edge is 1/4″.
Find more tips for sewing an accurate seam here.