Zipper Types Explained: How to Pick the Best Zipper for Every Sewing Project
Zippers seems to strike fear into the heart of beginner (and more experienced) sewists. Before you get around to installing a zipper, first you need to pick the right one from a wall of options.
Here’s your guide to zipper types and when to use them:
Types of Zippers
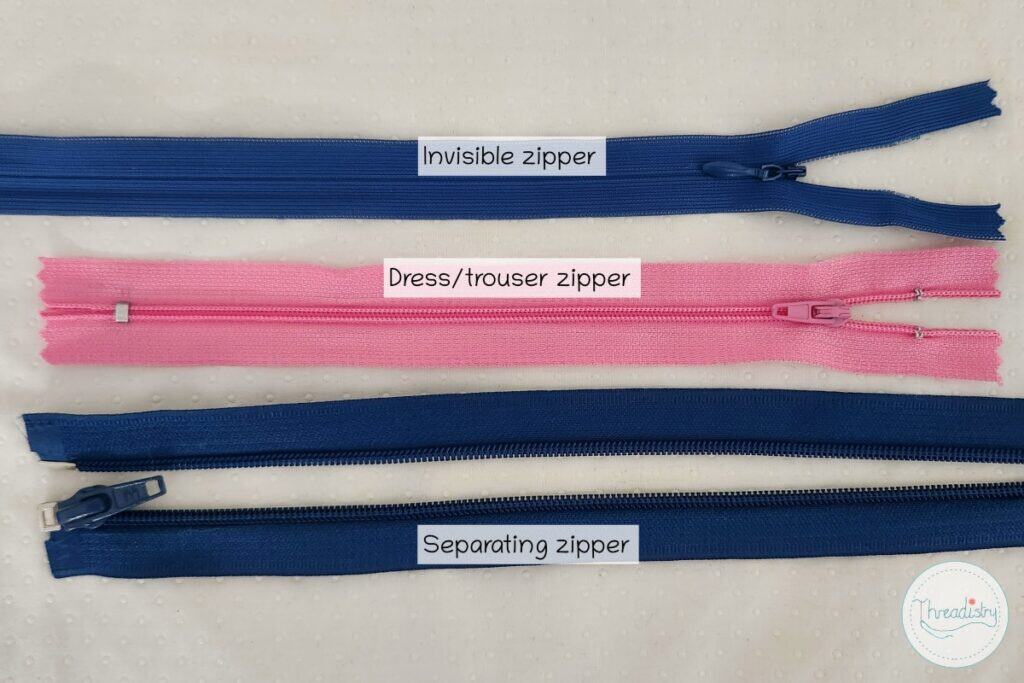
Dress/Trouser Zippers are the most common type of zippers. The zipper coil is on the right side of the zipper tape, and there is a stopper across the bottom of the coil.
Invisible Zippers are most often used in dresses and skirts. The coil on an invisible zipper is located on the wrong side of the zipper, and only the zipper pull is visible from the front of a garment. Invisible zippers are usually coil zippers and have a long, skinny pull.
Separating Zippers are designed so the two sides of the tape are able to come apart completely after the zipper has been installed. Separating zippers use a box and pin mechanism. They are most commonly found on coats and sweatshirts. They are also called open-ended zippers.

Two‑way (double‑slider) zippers have two sliders that move independently on the same chain. They can either open between the sliders, like on a suitcase (O-type) or open from both ends and the sliders meet in the middle, like on a sleeping bag (X-type).
Zipper Teeth Types

Coil Zippers are the most common type of zippers. They used to be made from nylon and are still often called nylon coil zippers, though they’re now usually made from polyester. Coil zippers are lightweight, heat resistant, and don’t rust.
Metal Zippers have two lines of metal teeth that have been molded and placed on either side of the tape at regular intervals. The teeth can be made from aluminum, nickel, or brass. They are most commonly found on jeans, workboots and handbags.
Plastic Molded Zippers are the similar to metal zippers except the teeth have been molded out of plastic. They are typically uused for jackets and sportswear, and have a chunkier look.
Parts of a Zipper

There are five major parts to a zipper:
- Tape: the fabric part of the zipper that is sewn to the item.
- Teeth: the part that joins together (to create the chain) and separates when closing and opening the zipper
- Slider: the part of the zipper that moves along the zipper, joining or separating the teeth
- Pull: attached to the slider
- Stops: barrier at each end of the zipper to stop the slide from pulling all the way off.
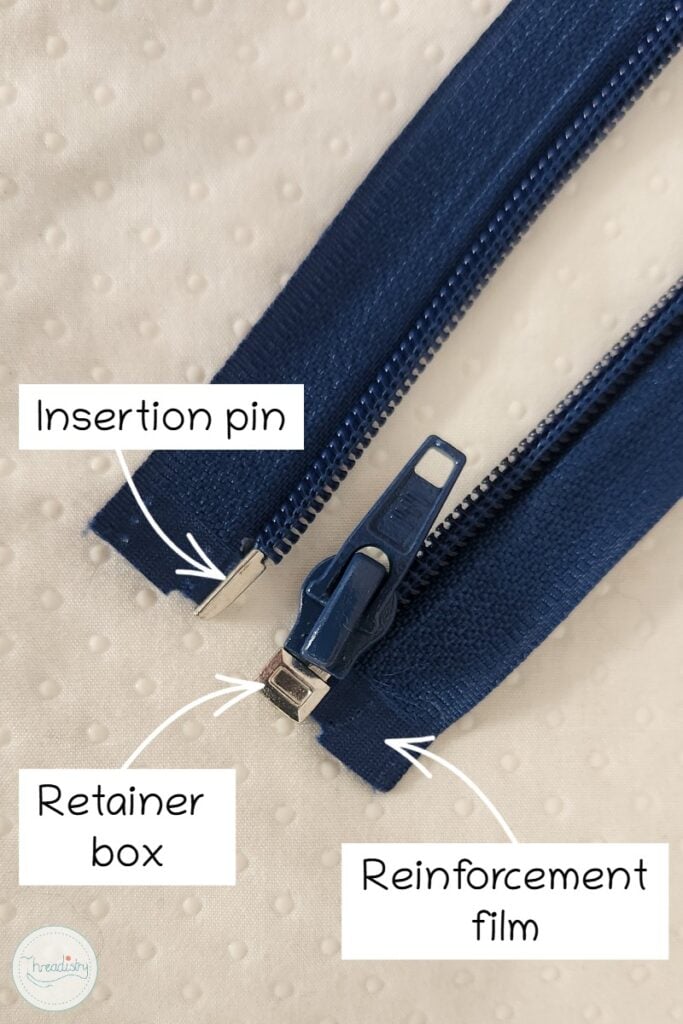
Separating zippers also have
- a retainer box,
- insertion pin, and
- reinforcement film.
The pin slides into the box to connect both sides of the zipper tape before you can zip upward.
Now you know the parts of a zipper, check out the parts of a sewing machine needle.
How to Measure a Zipper
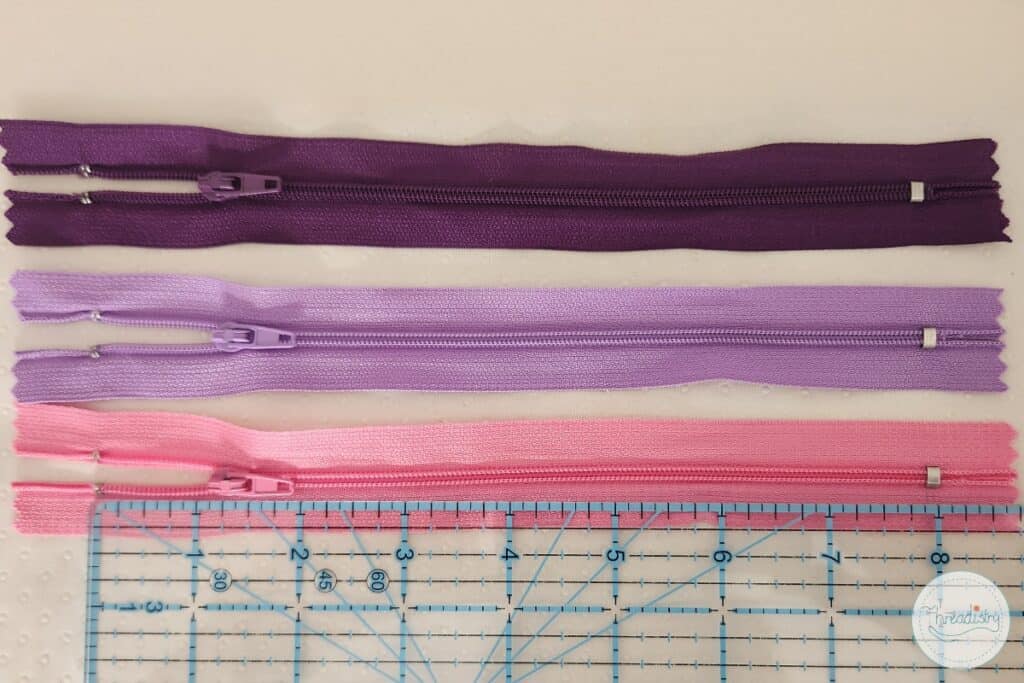
The length of a zipper is measured from the top stop and to the bottom stop. A separating zipper is measured from the top stop to the bottom of the retainer box. The extra tape at the top and bottom is not included when measuring a zipper. The zippers above are an 8 inch zippers.
The length of the zipper is usually listed in the notions section of a pattern. It’s usually the length of the opening in the fabric, although sometimes a longer zipper may be recommended.
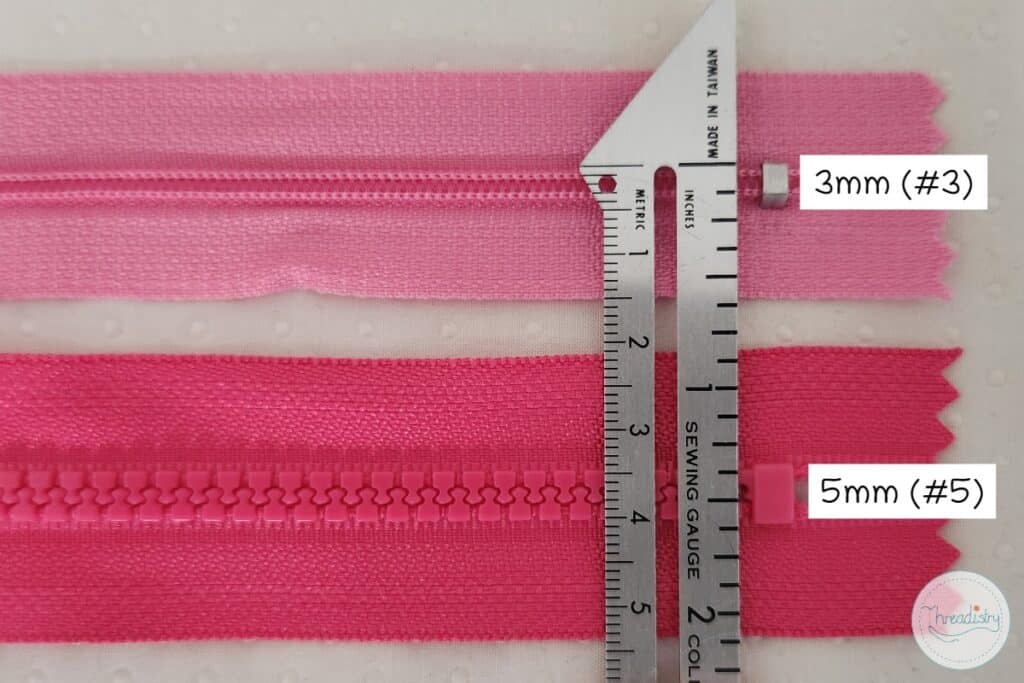
The #number for a zipper refers to the guage or width of the zipper chain (the width of the teeth when the zipper is closed). For example, the chain of a #3 zipper measures 3mm and a #5 zipper’s chain measures 5mm. Some brands print this number on the back of the zipper slider.
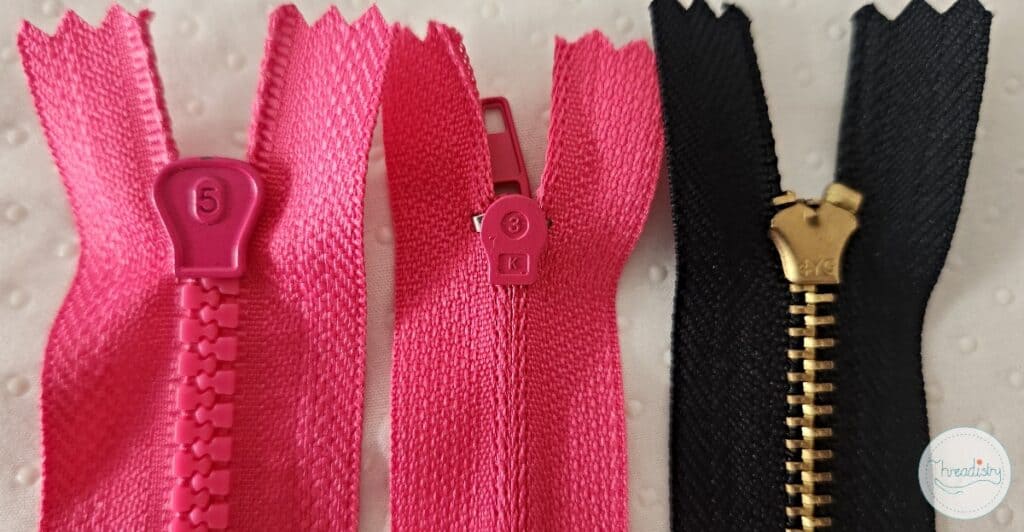
The higher the gauge number, the heavier and more durable the zipper is. Here are some guidelines for which size zipper to use for different applications
| Size Range | Gauge Numbers | Typical Applications |
|---|---|---|
| Small | #1 – #4 | Lightweight fabrics, clothing, small pouches, cushions and pillows |
| Medium | #5 – #7 | Jackets, bags, medium-weight items, upholstery |
| Large | #8 – #10 | Heavy-duty applications, luggage |
How a Zipper Works
The zipper slider controls the entire opening and closing mechanism. When you pull the slider upward, internal wedges guide the zipper teeth together in a precise interlocking pattern.

Each tooth features hooks and hollows designed to mesh with the opposite tooth. The slider’s internal structure forces these elements together under slight pressure, creating a secure bond.
Moving the slider downward reverses this process. A separating wedge inside the slider pushes the interlocked teeth apart, allowing the zipper to open smoothly.
Tips for choosing a zipper
Always check the notions list in your sewing pattern for the correct zipper type and size. If the type is not mentioned, follow these guidelines:
- Coil zippers are best for curved seams, garments and lightweight fabrics.
- Metal or molded plastic zippers are best for heavy-weight garments, such as trousers and jackets. Their sturdy, decorative design is also great for visible design details.
- Use invisible zippers for skirts, dresses, and tailored garments where you want the zipper hidden.
If you can’t find the correct length of zipper, buy a larger length. It’s easy to shorten a zipper.

Continuous zippers are also an option. This is a big long length of zipper tape that you can cut to the required length. Some include a zipper slider at regular intervals along the tape, or the sliders are separate for you to add when you sew. Some also include zipper stops.
I hope this helps you choose the right zipper for your next sewing project. More zipper tutorials are coming soon!